Luggage wheel-housing mounting pattern checklist
Use this checklist when you already know you are comparing wheel housings and need to record the installation pattern. Count fixings, map hole spacing, preserve orientation and verify recess clearance before comparing a candidate.
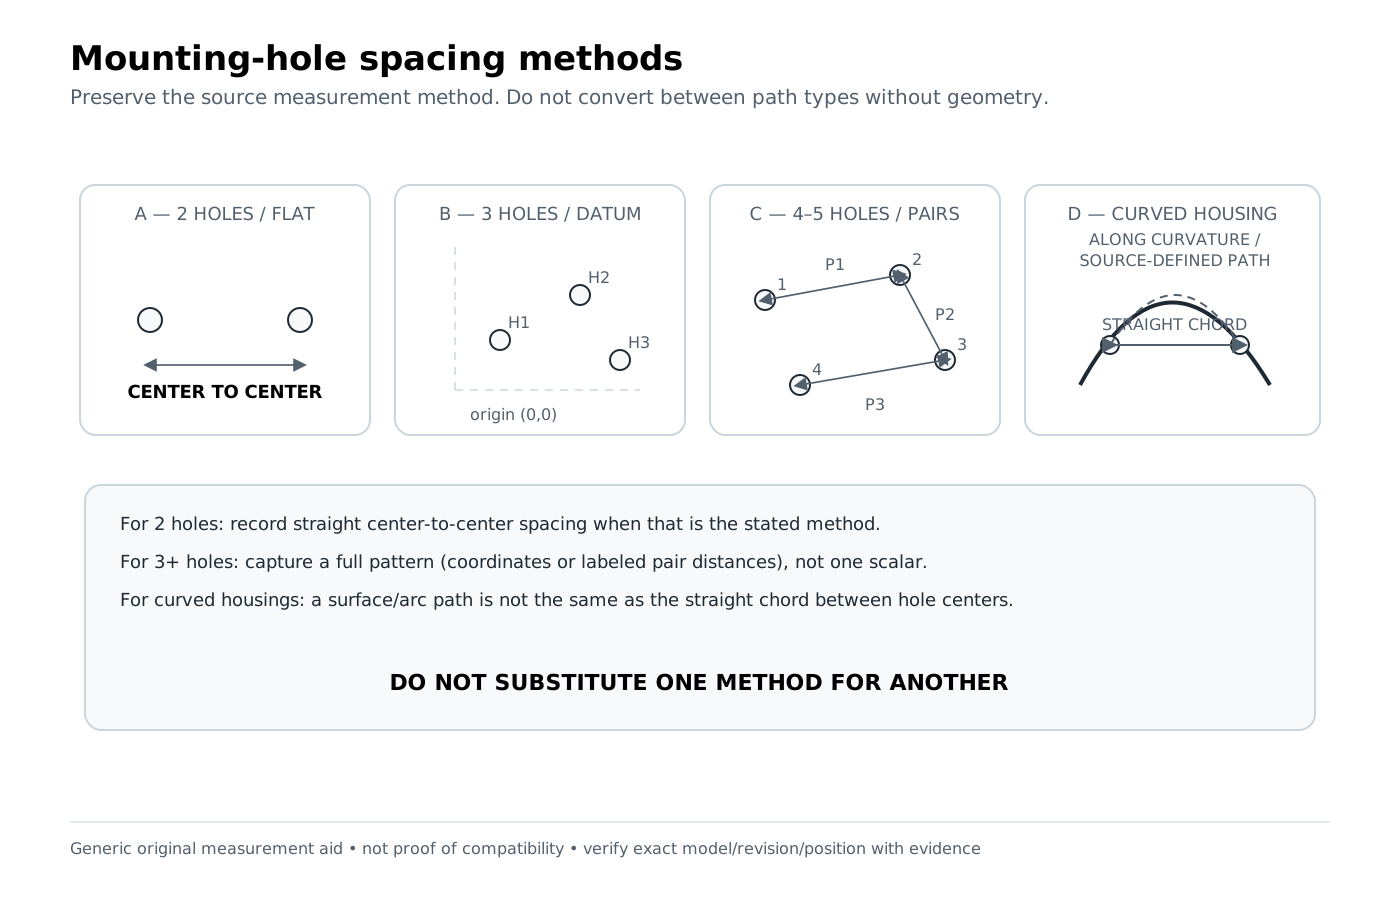
Preparation checklist
- Label the housing position before removal.
- Photograph the complete mounting face square-on.
- Count screws, rivets, studs, tabs and locating bosses separately.
- Use center-to-center spacing and millimetres.
- Record recess/clearance notes even if the hole pattern matches.
Installation-pattern workflow
- Count the fixing points. Two holes vs three/four holes is an immediate filter.
- Choose a reference orientation. Mark “front of case” and “outside edge.” A rotated pattern should not be mistaken for a mirror image.
- Measure center-to-center. For irregular multi-hole patterns, label the points A/B/C/D and record multiple pair distances.
- Note pattern shape. Straight line, triangle, rectangle, asymmetric cluster or curved mounting path.
- Check recess clearance. A matching pattern can still fail if the replacement housing is too deep, wide or differently contoured.
- Check handedness. Compare locating tabs, wheel offset and mounting-face contours, not just hole spacing.
- Escalate when needed. If shell shape or housing envelope is the uncertainty, use the full geometry guide before treating the part as a candidate.
Worked examples from project data
Example 1 — one spacing value can be useful inside a source-backed mapping
A DELSEY Clavel spinner assembly in the accepted data records a 48 mm wheel, about 78.74 mm overall height and 34 mm hole spacing. Its collection-to-part relationship is VERIFIED from the cited specialist mapping.
What to learn: 34 mm is a useful installation clue, but the VERIFIED status comes from the explicit fit source, not from 34 mm alone.
Example 2 — multi-distance patterns help distinguish candidates
A DELSEY Helium Aero carry-on candidate records LF/LR/RF/RR positions and a three-distance pattern of 21 × 15 × 26 mm, with an 82.55 mm housing height. That record is LIKELY because the specialist mapping and archived product identity align but no manufacturer spare-part crosswalk was found.
Common mistakes
- Measuring from screw edges rather than centers.
- Recording a single diagonal for an irregular three/four-hole pattern.
- Not marking which edge faces the suitcase front/outside.
- Assuming a rotated pattern and a mirrored housing are equivalent.
- Stopping at the screw pattern without checking housing recess clearance.
When the mounting pattern is not enough
A matching pattern should only create or strengthen a candidate. If the housing envelope, shell pocket, wheel offset, generation or corner is unknown, switch to the full housing guide. Explicit revision/position conflicts remain controlling evidence.
How to interpret the evidence
Identification clue means something you can observe or measure—an ID, position, diameter, hole pattern, stage count or mounting detail. A clue narrows the search but does not prove fit. A candidate match means several clues align well enough to investigate. Source-backed compatibility requires explicit evidence within the stated product, revision, position and part scope.
VERIFIED
Explicit source-backed relationship within the stated scope.
LIKELY
Identifiers or measurements align, but explicit authoritative fit is incomplete.
UNVERIFIED
Candidate or component-presence evidence only; not a confirmed replacement fit.
DOES_NOT_FIT
Explicit conflict, exclusion, wrong position, wrong revision, or non-fit evidence.
Where to go next
Use Search once you have identifiers or measurements. You can also browse Products, Part IDs, or the relevant part-type directory.
Related guides: Full housing geometry · Measure a wheel · Advanced corner codes
How this guide was prepared
This guide was prepared by the Luggage Parts Guide Editorial Team from source-tracked project data and original brand-neutral diagrams (mounting-hole spacing diagram). Measurements and identifiers are used as identification evidence, not as substitutes for explicit fit documentation. See the Editorial Policy and Methodology.
Reviewed: October 6, 2026