How to label luggage wheel position: front, rear, left and right
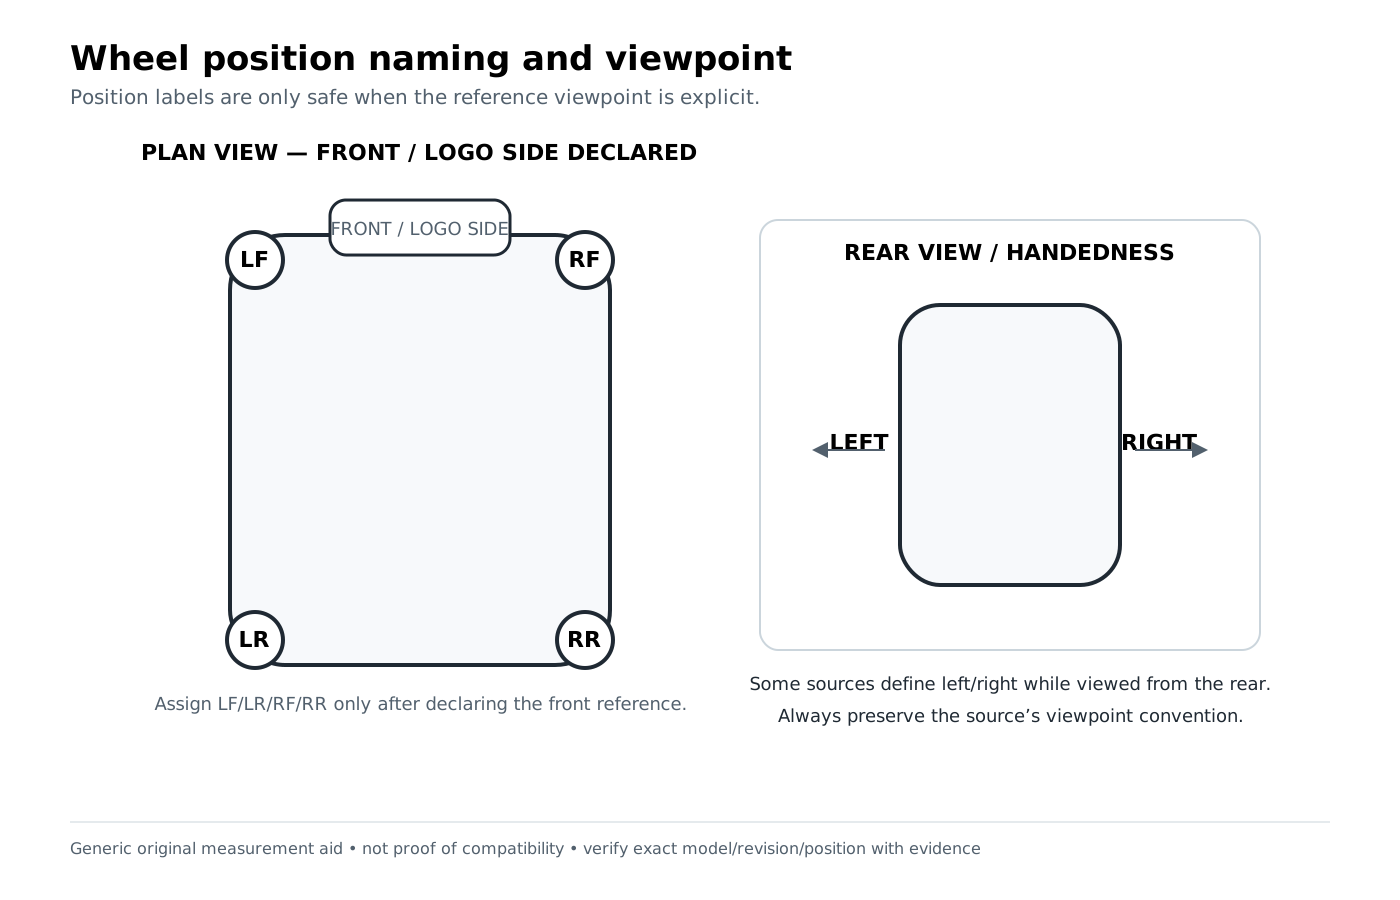
Choose one viewing position and never switch halfway through. Put the suitcase upright in normal travel orientation, declare which side is the front, then label left/right and front/rear from that fixed viewpoint.
Preparation checklist
- Place the luggage upright as it would roll.
- Choose and photograph the “front” reference—commonly the face you intentionally declare for the task.
- Write the viewpoint on your notes before using left/right.
- Label each removed housing/wheel immediately.
- Keep seller/OEM position wording separate until you confirm their viewpoint.
Basic position workflow
- Declare front and rear. Do not assume every seller uses the logo side or handle side the same way.
- Face the declared front. Your left is left; your right is right for this guide.
- Add front/rear. You now have four corners: left-front, right-front, left-rear and right-rear.
- Mark before removal. Use removable tape or a written photo reference.
- Translate cautiously. When a listing says “left” without viewpoint, treat it as unresolved until the seller diagram/text clarifies it.
Worked examples from project data
Example 1 — front pair is a real fit scope
An accepted Briggs & Riley Sympatico CX carry-on record maps a 50 mm front spinner wheel kit to the front left + right pair and is VERIFIED.
Example 2 — rear pair is separate even at the same diameter
A paired accepted record maps a 50 mm rear spinner wheel kit to the rear left + right pair and is also VERIFIED.
What to learn: equal 50 mm diameter does not erase front/rear fit scope.
Common mistakes
- Calling a wheel “left” while viewing from the rear, then comparing it with a seller who labels from the front.
- Using top-handle position as a substitute for declaring a viewpoint.
- Removing all four assemblies before labeling them.
- Assuming front and rear are interchangeable because the wheel diameter matches.
When a simple label is not enough
If the part is corner-specific, mirrored, handed, or the seller’s viewpoint is unclear, use the advanced LF/LR/RF/RR guide. Position can be source-backed fit evidence or explicit non-fit evidence, not just a convenient note.
How to interpret the evidence
Identification clue means something you can observe or measure—an ID, position, diameter, hole pattern, stage count or mounting detail. A clue narrows the search but does not prove fit. A candidate match means several clues align well enough to investigate. Source-backed compatibility requires explicit evidence within the stated product, revision, position and part scope.
VERIFIED
Explicit source-backed relationship within the stated scope.
LIKELY
Identifiers or measurements align, but explicit authoritative fit is incomplete.
UNVERIFIED
Candidate or component-presence evidence only; not a confirmed replacement fit.
DOES_NOT_FIT
Explicit conflict, exclusion, wrong position, wrong revision, or non-fit evidence.
Where to go next
Use Search once you have identifiers or measurements. You can also browse Products, Part IDs, or the relevant part-type directory.
Related guides: Advanced LF/LR/RF/RR guide · Measure wheel housing · Measure wheel
How this guide was prepared
This guide was prepared by the Luggage Parts Guide Editorial Team from source-tracked project data and original brand-neutral diagrams (wheel position/viewpoint diagram). Measurements and identifiers are used as identification evidence, not as substitutes for explicit fit documentation. See the Editorial Policy and Methodology.
Reviewed: October 6, 2026